

Apple season is here, and there is nothing quite like a homemade apple pie made with fresh apples and a flaky crust.
This is the apple pie I make from scratch, but one of my favorite things about this recipe is that you don't have to bake it right away. You can bake your apple pie today or assemble it, freeze it, and bake it straight from the freezer later.
That makes it especially handy during the holidays. I can make my Thanksgiving apple pie ahead of time, tuck it into the freezer, and have one less thing to do when the holiday gets busy.
Homemade Apple Pie: Bake Now or Freeze for Later

I'll walk you through the whole process, including my homemade pie crust, how I choose and taste the apples for the filling, how I know when I've added enough water to the dough, and how to freeze and bake the pie later.
Homemade apple pie doesn't need to be perfect. That's part of its charm. What matters is a tender, flaky crust and plenty of delicious apple flavor.
Why You Will Love This Apple Pie Recipe
Jump to RecipeMake it ahead. Bake it today or freeze the assembled pie and bake it later.
Use the apples you like. I like combining sweet and tart apples for more interesting flavor.
Adjust the sweetness yourself. Taste your apples before adding the sugar. Sweeter apples may need less.
Make the crust from scratch. I'll show you what to look for so you aren't guessing whether your dough has enough water.
No need to precook the filling. The apples go into the crust fresh and cook right along with the pie.

Choosing the Best Apples for Apple Pie
There isn't just one "right" apple for homemade apple pie. Start with apples you and your family enjoy.
I especially like using two varieties with contrasting flavors. For example, you might pair a sweeter apple such as Honeycrisp with a tarter Granny Smith. That gives you a nice contrast of flavors in every bite.
Most importantly, taste your apples before you make your filling.
Apples vary in sweetness, and that should help determine how much sugar you add. I use about ½ cup of granulated sugar in this pie, but you can adjust that depending on your apples and your own preference.
Ingredients for Homemade Apple Pie
One of the things I love about a traditional apple pie is how simple the ingredients are.
For the Homemade Pie Crust
You'll need all-purpose flour, salt, a little granulated sugar, cold unsalted butter, cold solid shortening, and ice water.
I use both butter and shortening in this crust. The butter adds wonderful flavor while the shortening helps create a tender crust.
Keep your butter and shortening very cold. I even put mine in the freezer before I begin.
For the Apple Filling
You'll need fresh apples, granulated sugar, flour, cinnamon, nutmeg, salt, fresh lemon juice, and a little unsalted butter.
I don't use a lot of sugar because I want the apples to be the star of the pie. That's another reason tasting your apples first is so important.
Crust: 3 cups all-purpose flour, 1½ teaspoons salt, 1 teaspoon granulated sugar, ½ cup cold unsalted butter, ½ cup cold solid shortening, and 4–6 ounces ice water.
Filling: 6–8 cups apples, ½ cup granulated sugar (more or less to taste), 1 tablespoon flour, 1 teaspoon cinnamon, ¼ teaspoon nutmeg, ¼ teaspoon salt, juice of ½ lemon, and 2 tablespoons unsalted butter.
With these basic ingredients, you'll be well on your way to crafting a delicious homemade apple pie. Experiment with the varieties of apples, the level of sweetness, and the spice combination to create the perfect pie to suit your tastes.
Whether it's for a holiday gathering or a simple weeknight dessert, your homemade apple pie is sure to be a hit.
How to Make an Apple Pie
How to Make Homemade Pie Crust
Combine the flour, salt, and sugar in a large mixing bowl.
Cut the very cold shortening into the flour mixture with a pastry cutter until you have small pieces distributed throughout the flour.
Add the cold butter and toss it with the flour mixture. Use your fingers to press and work the butter into the flour. Those little pieces of butter will help create delicious, flaky layers in your crust.
Now begin adding the ice water a little at a time.
This is one place where it's easy to make a mistake. Don't automatically add all of the water. Add just enough for the dough to begin holding together.
Divide the dough into two pieces, making the piece for the bottom crust slightly larger. The bottom crust needs enough dough to cover the bottom and sides of your pie plate.
Shape both pieces into rounds, wrap them, and refrigerate for at least 30 minutes.

Make the Fresh Apple Filling
Peel, core, and slice enough apples to give you about 6 to 8 cups.
Try to keep your slices relatively consistent, but don't worry about making them perfect. This is homemade pie.
Combine the sugar, flour, cinnamon, nutmeg, and salt. Sprinkle the mixture over your apples and toss everything together.
Add the juice of half a lemon.
Let the filling sit while you roll out your pie dough.
There's no need to cook the apple filling first.
Assemble Your Apple Pie
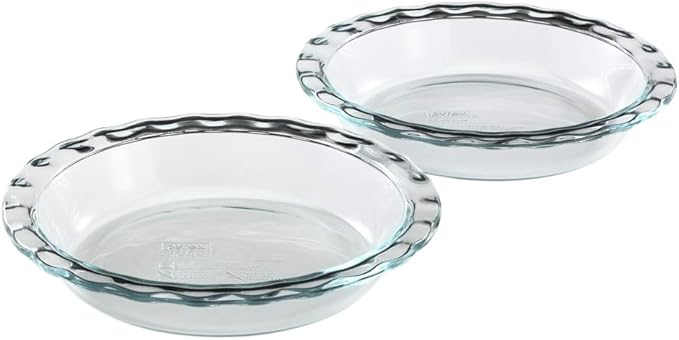
Lightly grease a 9-inch pie plate.
Roll the larger piece of chilled dough into a circle large enough to cover the bottom and sides of your pie plate with a little extra around the edge.
Transfer the dough to your pie plate and gently press it against the bottom and sides.
Add the apple filling and distribute 2 tablespoons of unsalted butter, cut into small pieces, over the apples.
Roll out your second piece of dough and place it over the filling.
Trim the dough as necessary and seal the top and bottom crusts together. Flute the edge with your fingers and cut several slits in the top crust so steam can escape.
Now you have a choice.
Bake Your Apple Pie Now or Freeze It for Later
To Bake Your Apple Pie Now
Brush the top crust with cream, milk, or an egg wash and sprinkle it lightly with granulated sugar, if desired.
Bake the pie at 425°F for 15 minutes.
Reduce the oven temperature to 350°F and continue baking for 45 to 55 minutes, until the crust is beautifully golden and the apple filling is bubbling.
Let the pie cool before serving so the filling has time to set.
How to Freeze an Unbaked Apple Pie
If you're making your apple pie ahead, don't add the milk, cream, egg wash, or sugar topping yet.
Place the fully assembled unbaked pie in the freezer until it is firm.
Once frozen, wrap the pie well with two layers of plastic wrap and place it inside a large freezer bag.
You can keep your unbaked apple pie frozen for up to two months.
That's what makes this such a useful Thanksgiving recipe. You can make the entire pie well before the holiday and have it waiting in the freezer.

How to Bake a Frozen Apple Pie
Here's the best part: you don't need to thaw your pie.
Remove the wrapping from the frozen pie.
Brush the frozen crust with cream, milk, or an egg wash and sprinkle it with a little granulated sugar, if desired.
Place the frozen pie directly into a preheated 450°F oven for 25 minutes.
Reduce the oven temperature to 375°F and continue baking for another 40 to 50 minutes, until the crust is golden brown and the filling is bubbling.
Allow the pie to cool before serving.
Frequently Asked Questions
Can I use a store-bought pie crust?
Absolutely. A prepared crust will save time. But if making pie crust has always intimidated you, I encourage you to give the homemade version a try. With a little practice, you can make a delicious homemade crust.
Do I need to cook the apples before making apple pie?
I don't. I prefer the texture and flavor of apples that cook right in the pie, and I haven't had a problem with my filling creating a large gap underneath the top crust. You can certainly try both methods and decide which you prefer.
What are the best apples for apple pie?
Use flavorful apples that you enjoy eating. I like combining a sweeter apple with a tarter variety for contrast. Honeycrisp and Granny Smith are one example.
Remember to taste the apples before deciding how much sugar to use.
How long can I freeze an unbaked apple pie?
I freeze my assembled unbaked apple pie for up to two months, wrapped well in plastic wrap and protected inside a freezer bag.
Pin This!

More Homemade Pies
There you have it! Bake an apple pie and capture the essence of fall. As the days get shorter and the nights get colder, take comfort in the simple joys of life, like a warm slice of homemade apple pie.
Happy baking!
Apple Pie Recipe

Homemade Traditional Apple Pie
A traditional apple pie made with seasonal apples, perfect for fall and fall holidays.
Ingredients
Instructions
- Combine the flour, salt, and sugar in a large mixing bowl.
- Add the cold, cubed shortening to the flour mixture. Use a pastry cutter to work the shortening into the flour until the mixture resembles coarse crumbs. Add the cold, cubed butter to the flour and shortening mixture. Use your hands to toss the mixture and coat the butter. Then, using your fingers, work the butter into the flour until the mixture resembles peas.
- Gradually add 4-6 ounces of ice water, a little at a time, and mix until the dough comes together. You may not need to use all the water.
- Divide the dough into two portions, with the piece for the base of a pie a little larger than the other. Shape them into discs, wrap them in plastic wrap, and refrigerate for at least 30 minutes.
- Peel, core, and slice the apples.
- Combine the sugar, flour, cinnamon, nutmeg, and salt. Pour over the apples and toss to cover.
- Squeeze the lemon over the apples. Set aside until ready to fill the pie shell.
- Preheat the oven to 425 degrees F.
- Roll out the two rounds.
- Lightly grease the pie dish.
- Place the larger round into the pie dish. Add the filling. Dot the filling with the 2 tablespoons of butter.
- Place the top crust onto the pie, trim as needed, and seal the edges. Flute the dough between your knuckles and fingers.
- Cut slits into the top of the pie.
- Brush cream, milk, or an egg wash (1 egg mixed with a little water) over the crust. Sprinkle with some granulated sugar.
- Bake the pie for 15 minutes at 425 degrees F. Reduce the heat and bake until the top of the pie is browned and the filling is bubbly, about 45-55 minutes.
Notes
Taste your apples and adjust the sugar as needed.
Make Ahead: Assemble the pie but don't add cream, milk, egg wash, or sugar to the crust. Freeze until firm, double wrap in plastic wrap, and place in a freezer bag for up to two months.
Bake From Frozen: Do not thaw. Brush the frozen crust with cream, milk, or egg wash and sprinkle with sugar. Bake at 450°F for 25 minutes. Reduce the temperature to 375°F and bake for another 40–50 minutes, until golden brown and bubbling.

Nutrition Facts
Calories
424Fat (grams)
23 gSat. Fat (grams)
10 gCarbs (grams)
52 gFiber (grams)
3 gNet carbs
49 gSugar (grams)
20 gProtein (grams)
5 gSodium (milligrams)
418 mgCholesterol (grams)
47 mgNutritional information is approximate.


It's easy to add me as a preferred source on Google, so my latest updates show up first in your search results and AI Overviews!
Add Just One Donna as Preferred Source
Comments
Post a Comment
Talk to me. I welcome your comments. (These comments are strictly moderated. Spammers take note.)