This honey-oat bread has become a favorite at my house. It's the reason I had to immediately replace my bread machine recently. Not that a bread machine is required to make this bread. It's just that a bread machine makes the bread making process so easy there is no reason not to make this bread.
A Hearty Honey-Oat Bread Perfect for Toast or Sandwiches
This post contains affiliate links. When you purchase through the links I earn a few pennies that help support the costs of this blog.
 |
| Honey Oat Bread |
Be warned that once you start making bread at home you won't want to buy bread at the store ever again. The cost of a comparable loaf of bread in the store is only one reason. More importantly, one bite of a freshly made loaf of bread is a taste of heaven.
Let's talk for a minute about using a bread machine. Quite frankly, I use the bread machine just to mix and knead my dough. I prefer to bake the bread in a traditional loaf pan in my oven. I don't like the shape of the bread baked in my bread machine or the hole made in the bottom of the bread by the bread machine paddle. I can avoid both of those issues by transferring the dough to a traditional loaf pan before baking.
You can use a mixer to mix and knead your dough, but I find that the bread machine takes all the guesswork out of the process when I use the dough setting. I just add the ingredients and 120 minutes later the dough is ready to transfer to a loaf pan. It's as easy as can be. That's why I wouldn't be without
my bread machine.
Honey-Oat Bread
Printer Friendly Recipe
Makes one loaf
 |
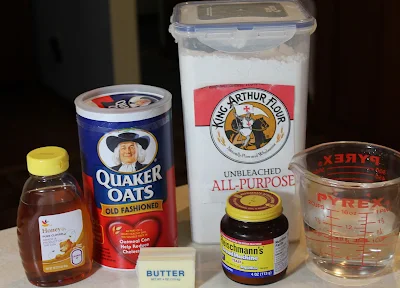
| Honey-Oat Bread Ingredients |
- 1 cup lukewarm water, add 2 Tablespoons more water in winter/low humidity
- 4 tablespoons unsalted butter, melted
- 3 tablespoons honey
- 1 1/2 teaspoons kosher salt
- 3 cups all-purpose flour
- 2 1/4 teaspoons instant, or bread machine yeast
- 1 cup old fashioned rolled oats
Bread Machine Directions
Add the ingredients to your bread machine in the order listed. Set the machine on the dough cycle. My bread machine dough cycle takes 120 minutes.
 |
| At the End of the Dough Cycle |
After the dough cycle completes, remove the dough to a lightly floured counter. Gently deflate the dough and shape into a rectangle loaf. Place the loaf in a lightly greased 9-inch loaf pan.
 |
| The Honey-Oat Dough in Loaf Pan |
Cover lightly with plastic wrap that you have sprayed with cooking oil and set aside to rise. In a warm kitchen, the dough will take 30-60 minutes to rise above the rim of the pan. Preheat the oven to 350 degrees F while the dough is rising.
 |
| Risen and Ready to Bake |
Remove the plastic wrap and bake the bread for approximately 30 minutes, until the bread is browned and an instant-read thermometer inserted into the center of the bread reads at least 190 degrees F.
 |
| Baked Honey-Oat Bread |
Remove the bread from the pan to cool on a rack. I like to run a stick of butter across the top crust to make it soft and buttery. Alternatively, you can melt two tablespoons of butter and brush the crust with it.
 |
| Rub Crust with Butter |
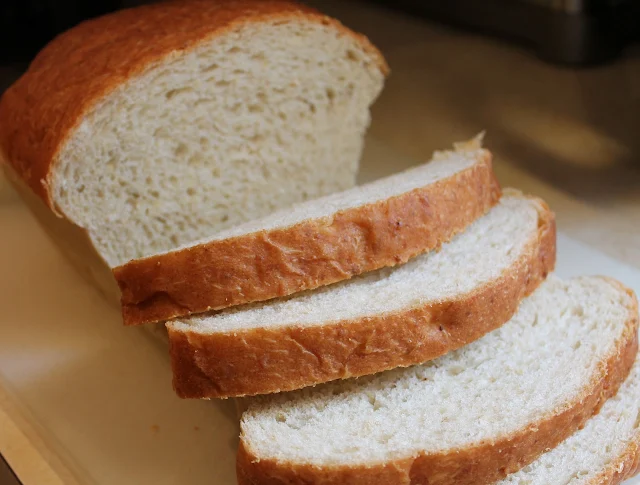
Let this bread cool completely before cutting. Use either a serrated knife or an electric knife to cut the bread. Either will help you to cut a slice just the thickness you want without squishing the bread in the process. The texture of this bread is lovely. It is perfect for sandwiches and yummy for toast.
 |
| Lovely Texture, Yummy Flavor |
You can wrap this bread well in plastic wrap and store it for a few days at room temperature...if it lasts that long. The bread will also freeze nicely.
Are you looking for other bread recipes?
No Knead Bread, a yummy, crusty bread.
Anadama Bread, a long-time family favorite, from my nana.
Essential Product
Before you go...Join the Just One Donna community by signing up for periodic emails with exclusive content. Sign up in the sidebar to get notified of new posts via RSS feed.
Enjoy!


Thank you for your wonderful bread recipe using all purpose flour! We super love it. I used organic light agave instead of honey and steel cut quick 3 minute Quaker oats. The bread raised great via my bread machine, then on its own and came out of the oven a beautiful smelling-ly great golden brown. Its soooooo delishious! Sincere thanks for sharing your recipe! ... t.a.
ReplyDeleteI love this recipe, too. So happy it worked out well for you.
Delete