How to Make Homemade Pie Crust from Scratch

How to Make Homemade Pie Crust: My Tips for a Flaky, Tender Crust

Pie season always makes me think about homemade pie crust.

Making your own pie dough can seem intimidating, but there are a few simple things you can do that make the process much easier. The goal isn't to create a perfectly smooth dough. 

In fact, some of the things that might look a little imperfect along the way are exactly what help create a flaky, tender crust.

A baked berry pie on a floured counter with butter, flour and a rolling pin.

I'll show you how I make enough dough for a generous double-crust pie, along with the little visual clues I use to know when the dough is ready. Jump to Recipe

Why This Pie Crust Works

1. For this crust, I use both solid shortening and butter. The shortening helps create a tender crust, while the butter adds flavor and helps create those delicious flaky layers.

2. Temperature matters, too. I chill both the shortening and butter before I begin. I put my shortening in the freezer for about an hour, and my butter is very cold as well.

Keeping the fat cold while making the dough is one of the keys to a good homemade pie crust.

Ingredients for a Double-Crust Pie

Makes: Enough pastry for one generous double-crust pie

  • 3 cups all-purpose flour
  • 1 1/2 teaspoons salt
  • 1 teaspoon sugar
  • A freshly baked blueberry pie. 8 tablespoons solid shortening, chilled
  • 8 tablespoons (1 stick) unsalted butter, very cold
  • 4 to 6 ounces cold water, as needed
A note about the water: You may not need all of it. The important thing is to add only enough water for the dough to hold together.

For Egg Wash:

  • 1 large egg
  • 2 teaspoons water
  • Sugar for sprinkling, optional

The Method

Start With the Dry Ingredients

Combine the flour, salt, and sugar in a large bowl and stir them together well.

The teaspoon of sugar isn't intended to make this a sweet crust. It's just enough to give the dough the tiniest hint of sweetness.

Cutting in shortening with a pastry cutter.
Cut In the Cold Shortening

Add the very cold shortening to the flour mixture.

I use a pastry cutter to work the shortening into the flour until I have roughly pea-sized pieces of
shortening and flour.

(#AD )Pastry Cutter

This is one of those simple kitchen tools that makes the job easy without requiring anything fancy.

Add the Cold Butter Differently

Next comes the cold butter.

A woman demonstrating how to blend butter into pie dough with her hands.
Instead of continuing with the pastry cutter, I use my hands.

Toss the butter with the flour mixture so that the flour begins coating the butter. Then press and squeeze the butter, flour, and shortening together.

You're not trying to completely blend the butter into the flour.

As you press the pieces of butter, you're creating little layers within the dough. Those layers are going to help give your finished crust that flaky, tender texture we're looking for.

Add the Water a Little at a Time

Now it's time to add the very cold water.

You'll need approximately 4 to 6 ounces, but don't add it all at once. You'll only use as much as you need to make the mixture moist enough to stick tgether.

A  fork being used to pull pie dough ingredients to the center of a glass bowl.
Start by sprinkling a few ounces over the flour mixture. Then pull the dough from the sides of the bowl toward the center, incorporating the dry bits with the moistened mixture. 

Use a fork for this step.

Add a little more water only if you need it.

How Do You Know When Pie Dough Has Enough Water?

A demonstration of squeezing the dough to know when it has been mixed sufficiently.
This is one of the most important parts of making pie crust.

Take some of the mixture in your hand and gently squeeze it together.

If it holds together, you have enough water.

The dough does not have to look smooth and completely combined in the bowl. You may still see some dry bits.

That's okay.

Once the dough holds together when you press it, stop adding water. Too much water and too much handling can make your crust tough instead of tender.

This simple test can help prevent you from adding more water than the dough actually needs. 

What Should Homemade Pie Dough Look Like?

Pie dough doesn't need to look smooth to be ready. In fact, a slightly shaggy mixture is exactly what you're looking for.

You should see small pieces of butter throughout the dough, and the mixture may still look a little crumbly in the bowl.

Use Plastic Wrap to Bring the Dough Together

A woman demonstrating how to use plastic wrap to pull  pie dough together.
Lay a piece of plastic wrap on your counter and turn the dough, including those remaining little dry bits, onto the plastic.

Then use the plastic wrap to help pull and press the dough together.

This is a handy way to form the dough without continuing to work it with warm hands.  You'll see pieces of butter in the dough. 

Divide the Dough for a Double-Crust Pie

Divide the dough into two pieces, but don't make them exactly the same size.

The bottom crust should be slightly larger because that piece of dough has to cover the bottom of your pie dish, come all the way up the sides, and extend over the edge. The top crust doesn't need quite as much dough.

For a standard 9-inch pie plate, I generally roll the bottom crust to about 12 inches across. This gives me enough dough to cover the bottom and sides of the dish, with some extra around the edge for sealing the top crust.

If you're using a deeper pie plate, you may need to roll the dough a little larger.

Shape each piece into a circle and flatten it into a disk. Take a moment to smooth the edges. This will make the dough easier to roll later.

Wrap the disks and refrigerate them for about 30 minutes.  If it chills for longer you may need to let the dough warm a bit before rolling.

While the dough chills, make your pie filling.

Roll the Pie Dough to Fit Your Pie Dish

A woman fitting the bottom crust for a pie into a pie dish. When you're ready to roll your dough, keep the size of your pie dish in mind.

I like to measure so I know I've rolled the dough large enough to fit into the dish and still have enough dough to extend over the edge.

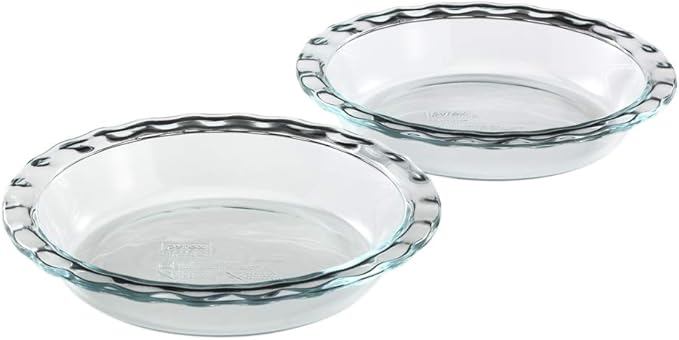
(#AD) Pie Dish

Once you've rolled the dough to the size you need, transfer it carefully to the lightly greased pie dish.

Press the dough gently against the sides of the dish so you don't leave gaps between the dough and the pie plate.

Then add your filling.

Add the Top Crust

A top pie crust overlapping the pie dish before trimming.
Roll your second disk of dough and place it over the filled pie. Take a look around the edges before you trim anything.

If you have excess dough in one area, save those pieces. They can come in handy if you discover another spot where the top and bottom crusts don't quite meet.

Once everything fits properly, roll the edges of the two crusts together to seal the pie.

How I Flute the Edge

A hand showing how to flute the edge of pie dough.
For a traditional fluted edge, I use two fingers on my left hand and the knuckle of my right hand to push the dough into that familiar scalloped shape.

Don't worry about making every flute identical. A homemade pie should look homemade.

Once the edge is finished, cut several slits in the top crust so steam can escape while the pie bakes.

Finish With an Egg Wash

For a beautifully browned, glossy crust, make a simple egg wash.

Using a brush to apply egg wash to a pie crust.Beat: 1egg with a couple of teaspoons of water

Brush the egg wash over the top crust.

I also like to sprinkle sugar over my pies. The egg wash helps the sugar stick while also giving the finished crust that beautiful golden appearance.

Bake your pie according to the directions for the filling you're using.

My Best Tips for Homemade Pie Crust

1. You want to see bits of butter in your dough. As the butter melts during baking, it creates flakiness.

2. Keep your shortening, butter, and water cold.  

3.  Add the water gradually. And when you're wondering whether the dough needs more water, squeeze some in your hand. If it holds together, stop. 

4. And finally, a tip passed down to me from my mom.  She would always tell me, "Never try to make a pie on a rainy day."  She believed humid weather made pie dough harder to handle. There's some practical wisdom behind that advice because the amount of moisture in your kitchen can affect how much water your flour needs. But don't let a rainy forecast stop you from making a pie. Just pay attention to the dough and add your water gradually.

With a little practice, you'll stop trying to make your dough look perfect and start recognizing when your dough is ready.

Troubleshooting Homemade Pie Dough

My pie dough is too crumbly. What should I do?

If the dough won't hold together when you squeeze it, sprinkle a little more ice water over the mixture. Work it in gently and test again. Add water gradually rather than pouring it all in at once.

My dough cracks when I roll it out.

Cold dough can crack if it hasn't had enough time to become workable. Let it sit at room temperature for a few minutes, then try rolling again. If the edges crack slightly, press them back together with your fingers.

My dough is sticking to the counter or rolling pin.

Use a light dusting of flour on your work surface and rolling pin. Turn the dough as you roll it, adding only enough flour to prevent sticking. Too much extra flour can make the crust dry.

Can I make pie dough ahead of time?

Yes. Wrap the dough disks tightly and refrigerate them if you plan to use them within a couple of days. For longer storage, freeze the wrapped disks. Thaw frozen dough in the refrigerator before rolling it out.

Pin This!

A woman holding an unbaked pie.


Flaky Homemade Double Crust Pie Dough

flaky crust, how to make pie
dessert
American
Yield: 8
Author: Donna Urso
Homemade Double-Crust Pie Dough Recipe

Homemade Double-Crust Pie Dough Recipe

A flaky homemade pie double crust, with simple tips to know when you have used enough water.

Prep time: 20 MinCook time: 60 MinInactive time: 30 MinTotal time: 1 H & 50 M

Ingredients

For Finishing the Pie

Instructions

  1. Combine the flour, salt, and sugar in a large mixing bowl.
  2. Cut the chilled shortening into the flour with a pastry cutter until the mixture contains approximately pea-sized pieces.
  3. Add the cold butter and toss it with the flour mixture to coat. Use your fingers to press and squeeze the butter into the flour and shortening, leaving visible pieces and layers of butter.
  4. Sprinkle a few ounces of cold water over the mixture. Pull the dry ingredients from the sides of the bowl toward the center.
  5. Test a small amount of dough by squeezing it in your hand. If it holds together, stop adding water. If it doesn't, add a little more water and test again.
  6. Turn the dough and any remaining dry bits onto a sheet of plastic wrap. Use the plastic wrap to help bring the dough together.
  7. Divide the dough into two pieces, making the portion for the bottom crust slightly larger.
  8. Shape each portion into a disk, smooth the edges, wrap, and refrigerate for about 30 minutes.
  9. Roll the larger disk to fit your pie dish with enough dough to extend over the edge. Transfer it to the dish and gently press it against the bottom and sides.
  10. Add your prepared pie filling. Roll the second disk and place it over the filling.
  11. Trim the crust as needed, reserving scraps for patching if necessary. Seal the top and bottom crusts together and flute the edge.
  12. Cut several slits in the top crust to allow steam to escape.
  13. Beat the egg with 2 teaspoons of water. Brush the egg wash over the crust and sprinkle with sugar, if desired.
  14. Bake according to the directions for your pie recipe.
Nutrition Facts

Calories

401

Fat (grams)

25 g

Sat. Fat (grams)

11 g

Carbs (grams)

38 g

Fiber (grams)

1 g

Net carbs

37 g

Sugar (grams)

2 g

Protein (grams)

6 g

Sodium (milligrams)

537 mg

Cholesterol (grams)

53 mg

Nutritional information is approximate.

It's easy to add me as a preferred source on Google, so my latest updates show up first in your search results and AI Overviews!

Add Just One Donna as Preferred Source


It's easy to add me as a preferred source on Google, so my latest updates show up first in your search results and AI Overviews!

Add Just One Donna as Preferred Source

Comments

More Popular Posts

Grandma's Soft and Chewy Date-Filled Cookies

One of the things I can count on as the Thanksgiving and Christmas seasons arrive each year is a feeling of nostalgia. The traditional foods we serve at our family's holiday tables can surely bring out all the feels. Now that it is officially cookie season, we should kick it off with a soft, tender cookie with dates that is a special, nostalgic, family recipe.  This old-fashioned homemade date-filled cookie recipe is at the top of our family favorites list. An Old-Fashioned Date Cookie Recipe What are old-fashioned date-filled cookies?   Old-fashioned date-filled cookies are a nostalgic, soft sandwich cookie featuring two rounds of tender sugar cookie dough with a sweet, homemade date jam filling in the center.  This vintage 1930s recipe is a traditional holiday favorite, prized for its soft texture and the perfect balance of buttery dough and naturally sweet dates. This old-fashioned, date-filled cookie was my dad's favorite cookie from his childhood. M...

Crunchy, Spicy Gingersnap Cookies

An Old-Fashioned Cookie That Always Turns Out There’s something about a good gingersnap cookie that just feels right. Not fancy. Not complicated. Just dependable… and really, really good. These crunchy, spicy gingersnaps are the kind of cookie you make when you want something you know will turn out—and something everyone will recognize and enjoy. They’ve got that classic crackled top, a warm blend of spices, and just enough sweetness to balance it all out. And the best part? They’re easy. No mixer required. A Traditional Ginger Snaps Cookie Recipe ( This post contains affiliate links.  I will be compensated when you make a purchase with these links.) Gingersnaps Cookies This old-fashioned gingersnap cookie is a winner.  It's easy to make and will be a favorite in your recipe rotation.

Artisan Bread in Your Bread Machine

Finally. Artisan Bread from Your Bread Machine Yes, Really. If you want to make artisan-style bread using your bread machine, the secret is simple: use the dough cycle, then bake the loaf in a preheated Dutch oven. This method gives you a crisp crust and chewy crumb without any hand kneading. If you use your bread machine regularly, you already know what it does well. It mixes, kneads, and handles the first rise beautifully. It is a dependable helper in the kitchen. What it does not do especially well is produce that deep golden, crackly crust we associate with artisan bread. The good news is you do not need to give up the ease of your bread machine to get that result. You simply need to change how the bread is baked. Today I’m showing you how to use your bread machine’s dough cycle and bake the loaf in a Dutch oven for a crusty, bakery-style result.

The Ultimate Cinnamon Swirl Bread: A Bread Machine Recipe

Today's recipe will fill your kitchen with an incredible aroma and lots of smiles. It's homemade cinnamon swirl bread made with your bread machine. If you’ve ever struggled to get that perfect cinnamon swirl or ended up with gaps or leaking filling, this method fixes that using your bread machine. Bread Machine Cinnamon Swirl Bread (Soft, Easy Recipe) This post includes affiliate links. This recipe brings together the ease of your trusty bread machine with the deliciousness of a warm, sweet, and perfectly swirled cinnamon bread. Get ready for a slice of pure comfort!

How to Make a Perfect Bacon and Eggs Breakfast

In my opinion, the best breakfast consists of two perfectly fried eggs, crispy bacon, and toast made with hearty bread. This bacon and eggs recipe delivers. Bacon and eggs or eggs and bacon? No matter, it is definitely the breakfast you want on those lazy mornings when you have time to relax around the kitchen table, drinking a cup of coffee or two. The Best Bacon and Eggs Breakfast (This post contains affiliate links for your shopping convenience.  When you make a purchase using these links you help support this blog.) How to Cook Bacon and Eggs My technique was learned from my mom, by watching her make our family's breakfast over and over again, year after year.  This is a basted egg recipe which means the eggs are cooked in bacon grease. Cooking eggs in bacon fat is easy and takes just a little practice to perfect.

Traditional New England Whoopie Pies

These old-fashioned whoopie pies are soft, chocolatey, and filled with a rich, creamy filling, just like the ones many of us remember. What is an original New England Whoopie Pie? This is a true New England-style recipe. If you’re looking for a true whoopie pie recipe—the kind made in New England with a cooked filling—this is it. Whoopie pies are a beloved treat, a nostalgic dessert that evokes childhood memories and continues to delight today. My mom would make them for us every once in a while. Oh, what a treat to come home from school to a platter of chocolate whoopie pies! This recipe, inspired by traditional Maine-style whoopie pies, comes from my family recipe box. It delivers soft, chocolatey cakes with a rich, creamy cooked filling, no marshmallow fluff needed! The Best Whoopie Pies Recipe (Soft Cakes & Creamy Filling) This post includes affiliate links. Whoopie pies are essentially handheld cake sandwiches: soft, round, cake-like cookies embracing a ...

How to Trap and Get Rid of Fruit Flies

If you have fruit flies in your kitchen, the fastest homemade solution is a simple mixture of apple cider vinegar and one or two drops of dish soap.  The vinegar attracts the fruit flies, while the dish soap breaks the surface tension so they sink instead of escaping. Most people begin seeing results within a few hours. No chemicals. No special equipment. Just a quick fix that actually works. The Best Homemade Fruit Fly Trap (Works in Hours) Those pesky little buggers can often be brought into your home on the vegetables and fruit you buy. You don't have to put up with the annoyance. This homemade fruit fly trap is one I have been using for many years, and it works every time.

Five Keys to Growing A Healthy Ficus Tree

Have you ever wondered how a single Ficus benjamina tree could become a beloved part of your home for decades, thriving and growing alongside your family?  If you haven’t yet, you might consider the addition of this living, air-purifying companion in your home that not only beautifies your space but also stands the test of time.  You may know this tree as either a Ficus benjamina or a weeping fig.   I have loved growing a ficus tree in my home for 36 years. It’s remarkable that I've had this tree for so long.   How to Grow A Ficus Tree Inside for Decades This post includes affiliate links. I may receive compensation when you use these links. When thinking about how I managed to keep this indoor ficus tree happy, healthy, and growing strong all these years it boiled down to five key Ficus benjamina plant care tips. Follow these tips and you can have a happy, healthy ficus tree in your home for many years, too.

The Best Asian Dipping Sauce You'll Ever Taste

If you're looking for a versatile, easy-to-make Asian dipping sauce perfect for sushi and dumplings, then you've come to the right place. This recipe for the best Asian dipping sauce is perfect for any time you want a  kick of delicious Asian flavor. An Asian Dipping Sauce for Sushi and Dumplings Try this if you are looking for a dipping sauce that is a little more flavorful than you typically get with your takeout order. You'll love it with dumplings, too!

Amaretti Cookies for Your Christmas Cookie Platter

Are you looking for Christmas cookie suggestions? During the holiday season, while you're pondering classic Christmas cookie favorites like sugar cookies and gingerbread men, consider adding a touch of Italian flair to your Christmas cookie platter.  Try Amaretti, delicate Italian almond cookies, with a subtly sweet flavor and crumbly texture. They are sure to become a cherished family treat. These classic Italian cookies have become a favorite Christmas cookie at my house. How to Make Classic Italian Amaretti Cookies Homemade Amaretti cookies bring a touch of sophistication and elegance to any dessert spread, making them perfect holiday treats. Their crisp, slightly chewy texture offers a delightful contrast to the usual soft, gooey holiday desserts. With a subtle almond sweetness, these cookies appeal to adults and kids alike and bring a taste of Italy to your holiday table. What Are Amaretti Cookies? Amaretti cookies have a rich history i...